Ubuntu编译安装实时内核
前言
使用panda机械臂时,需要使用Linux的实时内核以保证控制性能(1000hz的频率)。而Ubuntu自带的内核实时性满足不了需求,因此需要自行编译一个实时内核。
下载安装
1.查看自己系统目前的内核版本
uname -r
2.下载安装实时内核文件
我安装的是Ubuntu20.04.6 LTS,内核版本是 5.15.0.79.86。因此我需要安装最新的5.15版本的PREEMPT_RT内核,在这个网站。(安装和当前默认内核最接近的RT内核,遇到问题的可能性最小)
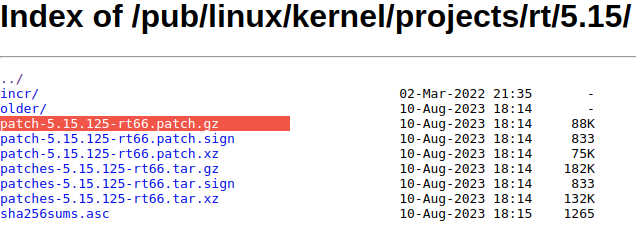
下载 patch-5.15.125-rt66.patch.gz
这个网站linuxfoundation可以查看最新的PREEMPT_RT内核。
创建一个新的文件夹:
mkdir ~/kernel
进入这个文件夹:
cd ~/kernel
从这个网站 https://mirrors.edge.kernel.org/pub/linux/kernel/v5.x/ 去下载 5.15.125版本的内核文件:
wget https://mirrors.edge.kernel.org/pub/linux/kernel/v5.x/linux-5.15.125.tar.gz
你也可以手动下载这个文件,然后复制到kernel文件夹。
解压:
tar -xzf linux-5.15.125.tar.gz
下载对应的rt_preempt patch, 对我们来说就是刚刚的patch-5.15.125-rt66.patch.gz
wget http://cdn.kernel.org/pub/linux/kernel/projects/rt/5.15/patch-5.15.125-rt66.patch.gz
你也可以手动下载,然后拷贝到kernel文件夹。
解压
gunzip patch-5.15.125-rt66.patch.gz
切换目录,打实时补丁
cd linux-*/
patch -p1 < ../patch-*.patch
复制当前引导的内核配置作为新实时内核的默认配置
cp -v /boot/config-$(uname -r) .config
打开“软件和更新”。在 Ubuntu 软件菜单中勾选“源代码”框
我们需要一些工具来构建内核,安装它们:
sudo apt-get build-dep linux
sudo apt-get install zstd
sudo apt-get install libncurses-dev flex bison openssl libssl-dev dkms libelf-dev libudev-dev libpci-dev libiberty-dev autoconf fakeroot
启用所有 Ubuntu 配置,我们只需使用:
yes '' | make oldconfig
然后我们需要在内核中启用rt_preempt:
make menuconfig
并设置以下内容:
# Enable CONFIG_PREEMPT_RT
-> General Setup
  -> Preemption Model (Fully Preemptible Kernel (Real-Time))
  (X) Fully Preemptible Kernel (Real-Time)

# Enable CONFIG_HIGH_RES_TIMERS
-> General setup
  -> Timers subsystem
  [*] High Resolution Timer Support

# Enable CONFIG_NO_HZ_FULL
-> General setup
  -> Timers subsystem
  -> Timer tick handling (Full dynticks system (tickless))
    (X) Full dynticks system (tickless)

# Set CONFIG_HZ_1000 (note: this is no longer in the General Setup menu, go back twice)
-> Processor type and features
  -> Timer frequency (1000 HZ)
  (X) 1000 HZ

# Set CPU_FREQ_DEFAULT_GOV_PERFORMANCE [=y]
->  Power management and ACPI options
  -> CPU Frequency scaling
  -> CPU Frequency scaling (CPU_FREQ [=y])
    -> Default CPUFreq governor (<choice> [=y])
    (X) performance

->  Cryptographic API
 ->  Certificates for signature checking (at the very bottom of the list)
  -> Provide system-wide ring of trusted keys
   -> Additional X.509 keys for default system keyring
   Remove the “debian/canonical-certs.pem” from the prompt and press Ok

->  Cryptographic API
 ->  Certificates for signature checking (at the very bottom of the list)
  -> Provide system-wide ring of trusted keys
   -> X.509 certificates to be preloaded into the system blacklist keyring
   Remove the “debian/canonical-certs.pem” from the prompt and press Ok
保存以上配置,退出 。
编译内核:
make -j `nproc` deb-pkg
根据CPU性能大概需要10-30分钟。
然后我们安装所有内核 debian 软件包
sudo dpkg -i ../*.deb
现在应该安装实时内核了。重新启动系统并检查新的内核版本
reboot
uname -r
