Deeplearning on Windows with WSL2 pytorch - Using Pycharm as the IDE
Directory
- Preface
- Install WSL
- WSL installs Anaconda and configures the environment
- Pycharm connects to WSL and uses the environment generated by conda
Preface
Generally speaking, the efficiency of deep learning training under Linux system is higher than that of Windows system, and everyone usually uses Ubuntu, a common distribution of Linux. But Ubuntu is not very friendly to everyday use, so there is a compromise and use Windows Subsystem Linux (WSL).
After testing, the training efficiency in WSL is about 25% better than Windows. CUDA118 is used in the following tests, the only difference is that the Python version is 3.9 and the other is 3.10.


Video tutorial links:Bilibili,Youtube
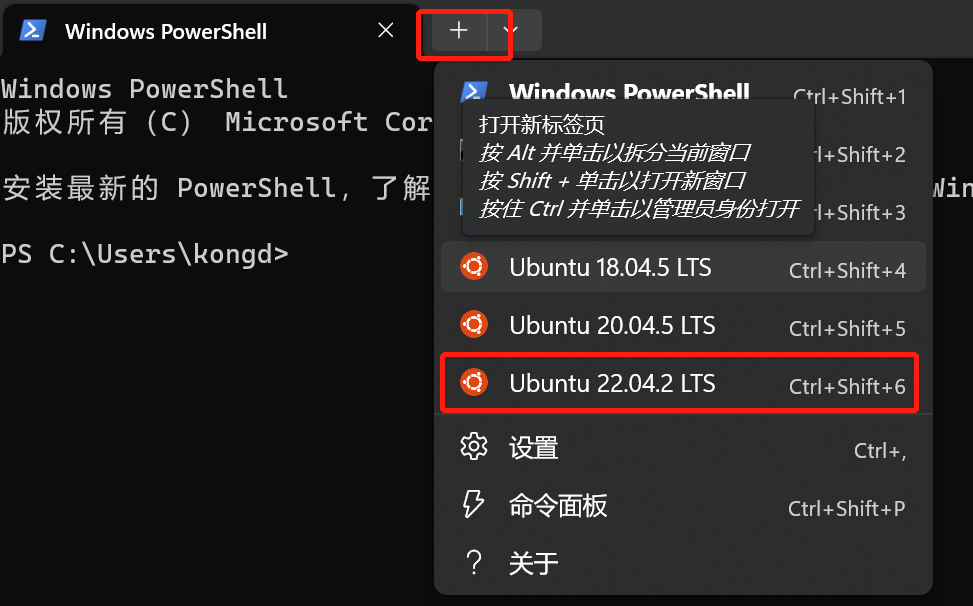
Install WSL
This part refers to the previous blog Windows 11 installation of WSL2, ROS and window visualization, only need to install WSL2, install ROS part of the part do not care.
You can also find this part in the video tutorial start part.
WSL installs Anaconda and configures the environment
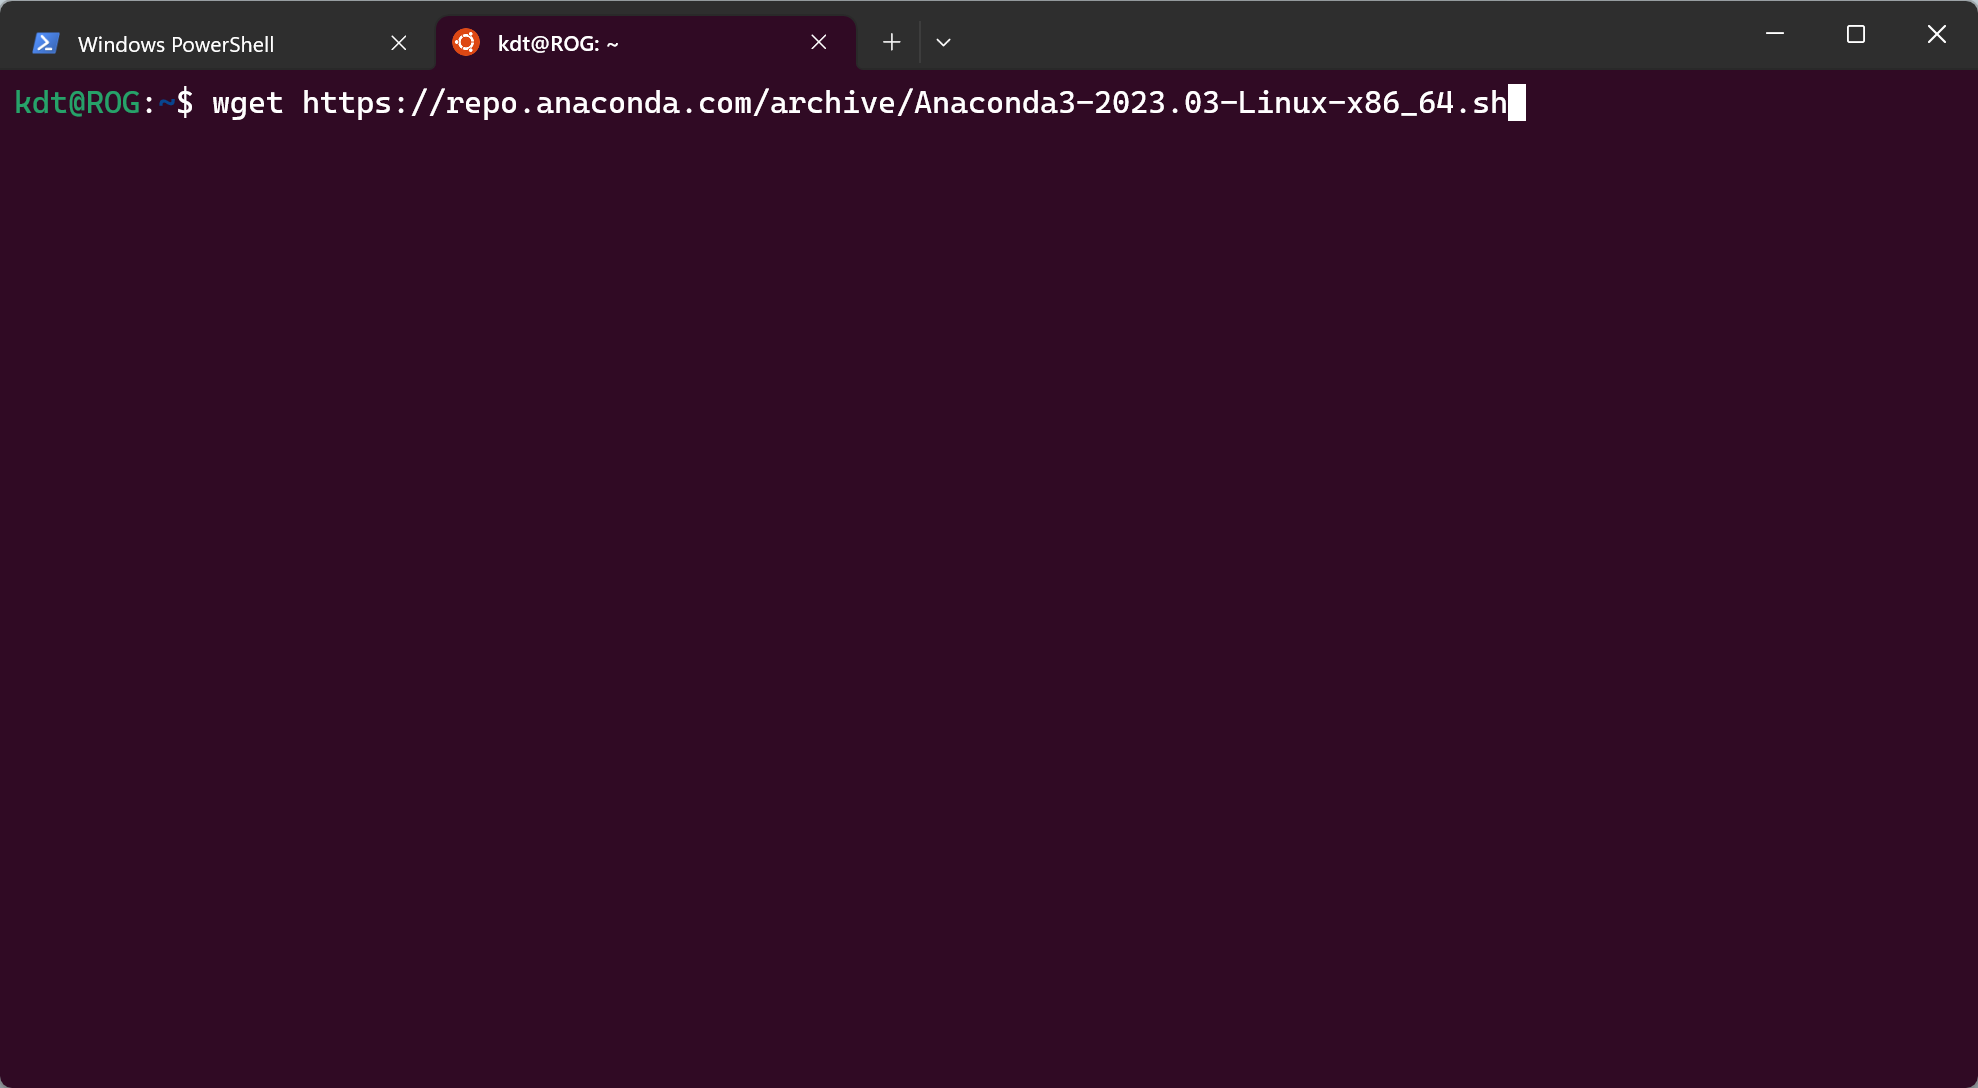
Open the previously installed Ubuntu system in the terminal that comes with Windows 11, and then the operation is exactly the same as using the command line on the Ubuntu host.
- Install Anaconda
Anaconda3 official download, select the Linux version, right-click on it with the mouse, and copy the link.
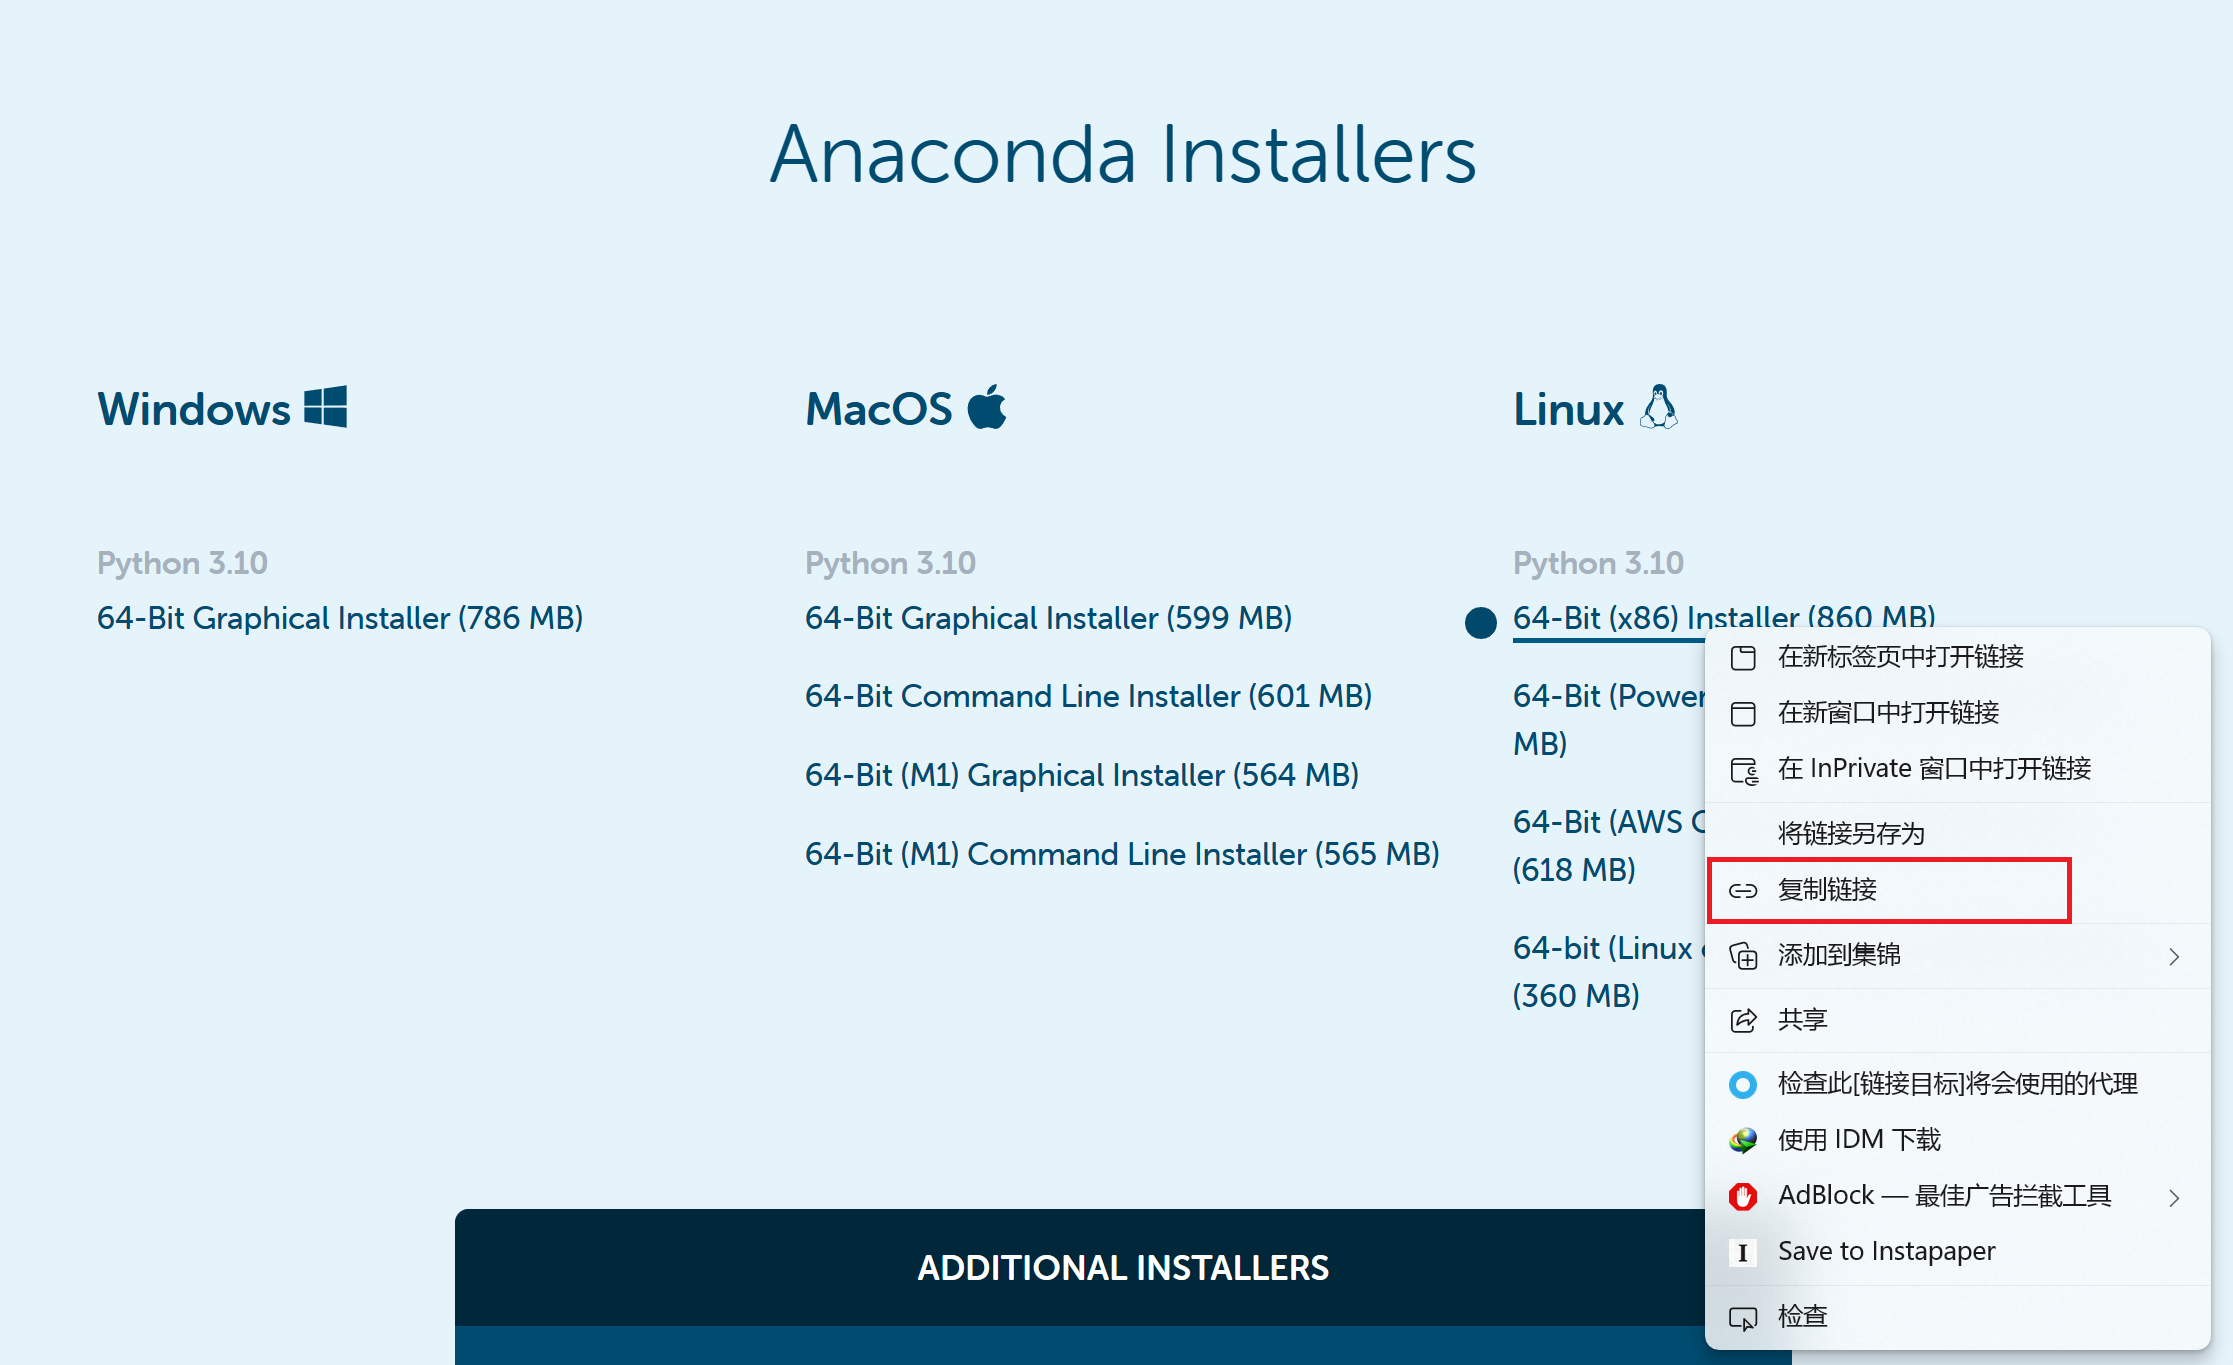
Back in Ubuntu’s terminal, type:
wget https://repo.anaconda.com/archive/Anaconda3-2023.03-Linux-x86_64.sh
Run the above code and download Anaconda3 to WSL Ubuntu.
After that, execute:
sh Anaconda3-2023.03-Linux-x86_64.sh
Just type sh A and press the Tab key, and the system will automatically complete the following content.
The next step is the installation process, just press enter or enter yes when prompted.
- Conda configures the environment
Conda creates a virtual environment
 conda create --name cu118py310 python=3.10
 conda activate cu118py310

Configure pytorch
Go to the pytorch official website, select the desired environment (note that Linux OS is selected here), copy the conda command, paste in terminal, enter, and install the environment:
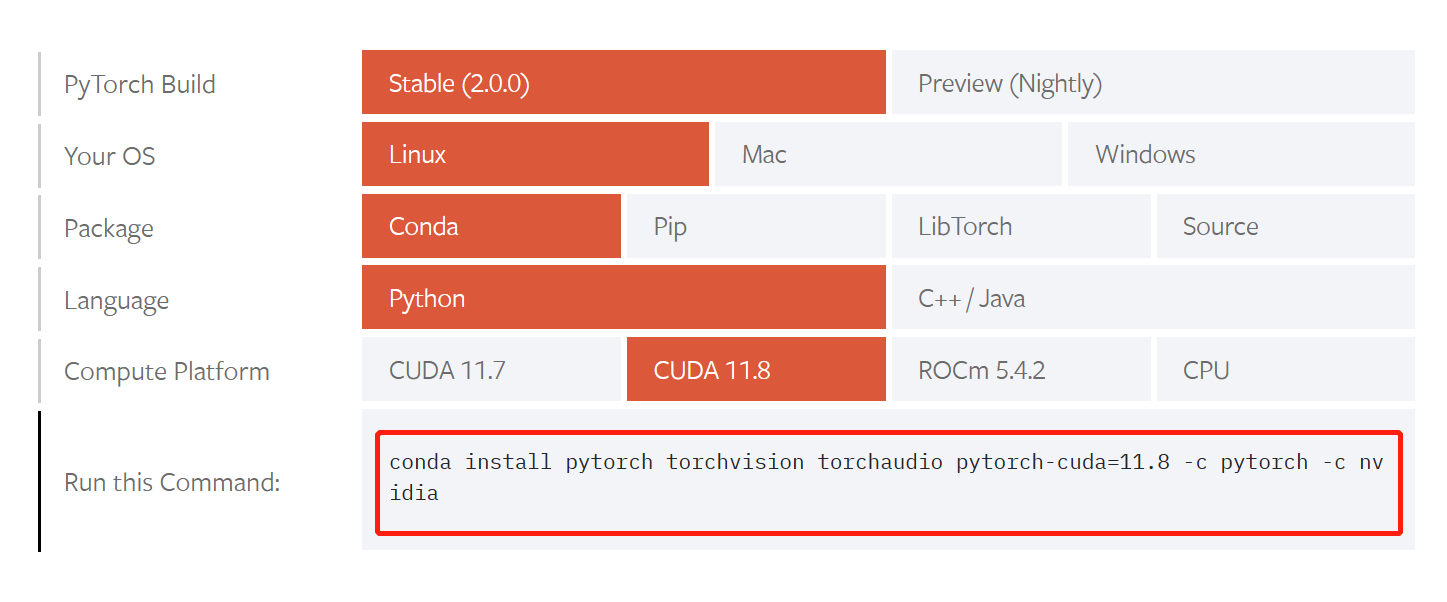
conda install pytorch torchvision torchaudio pytorch-cuda=11.8 -c pytorch -c nvidia
This concludes the environment configuration of WSL.
Pycharm connects to WSL and uses the environment generated by conda
Pycharm Professional Edition (Community Edition and Education Edition do not have convenient WSL function), click the bottom right and select Add New Interpreter, the operation is shown in the following figure:

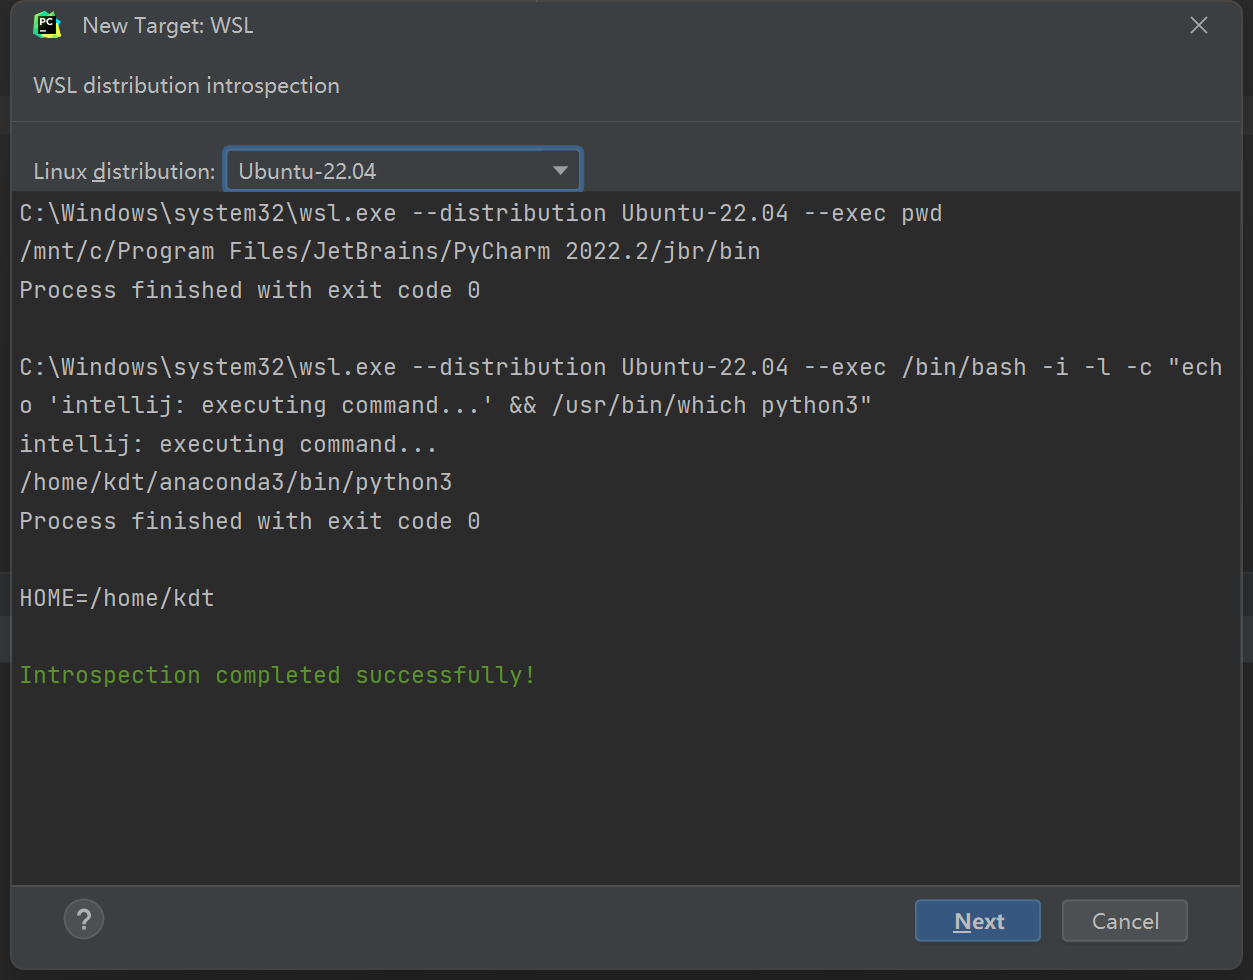
Select the Linux_distribution you created and Next:
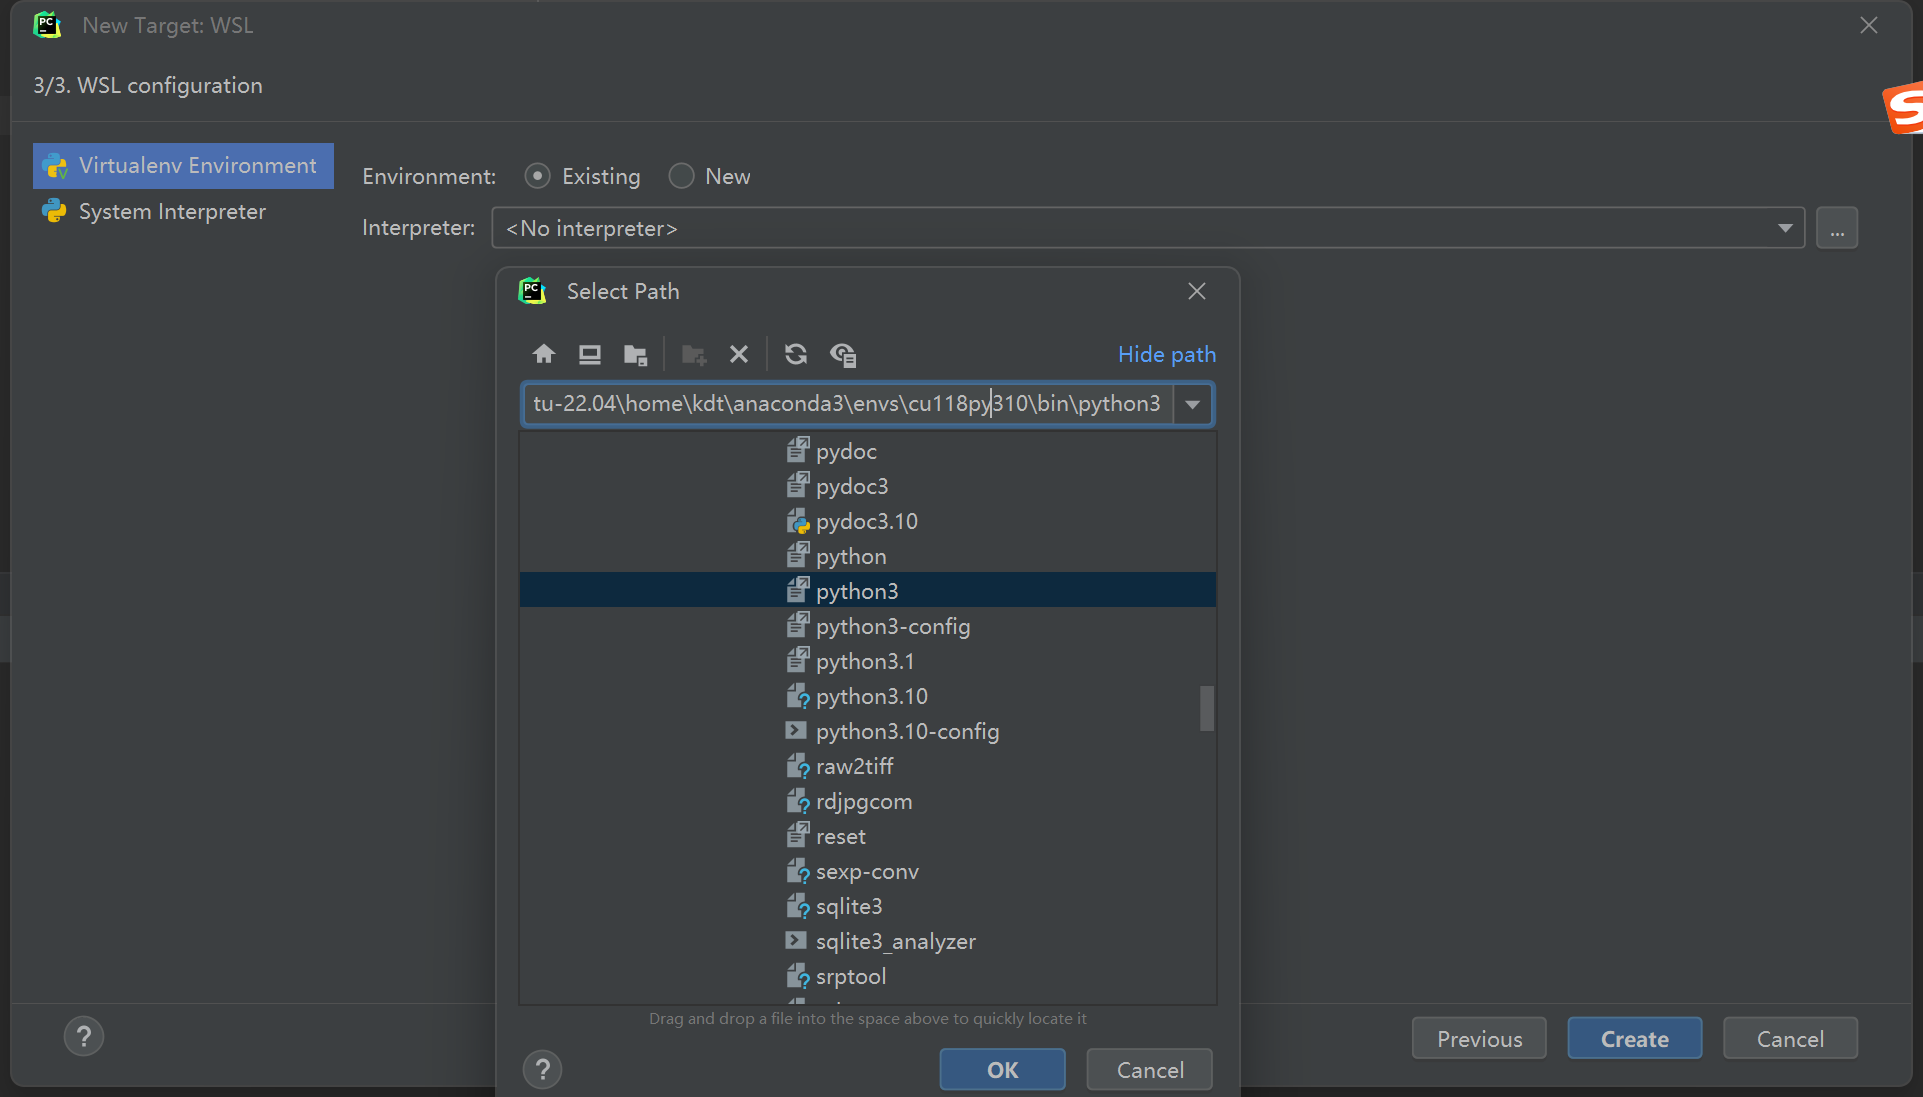
Virtualenv Enviroment–Existing – click…– Select this path \wsl$\Ubuntu-22.04\home\username\anaconda3\envs\cu118py310\bin\python3,Create。
Wait a few moments and the new environment will be configured. Then you can use this environment to train and run!